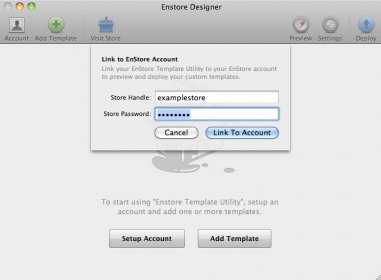
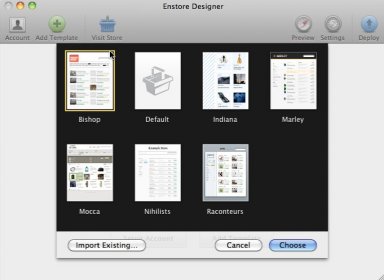
Enstore Designer will fetch all the product information from your account and use it to populate your local template. The advantage of this is that you can work with real data, so you can see what the store will actually look like when it's live. Open Enstore Designer and click the Account icon on the top left corner of the toolbar. Fill in your credentials and click link to account. To run a template you can either choose one of the default Enstore templates or start from scratch. Click the green Add Template icon. Enstore Designer shows you a sheet with templates you can choose from. If you pick a default template Enstore Designer will install the template on your hard disk in a folder of your choosing. That template can then be customized by you. If you already have a template somewhere on your hard disk, click Import Existing on the templates sheet. Select the folder you want to add. Such a folder must at least have a templates and assets folder in it. We recommend using one of the default templates, everything you'll need is already in there, and you just have to customize the looks. When you're satisfied with the new look of your template, you can select it and click the Deploy toolbar icon. Enstore Designer will now upload your template to Enstore. Use the Enstore admin's template chooser to preview your deployed template or make it the default template for your store.


Comments